Sunday, September 30, 2012

Day 30


Nessa's Dreamy Creamy Sugah Scrub

 Nessa's Naturals has an assortment of natural beauty products, but at Italy Ava our ultimate favorite is the Sugah Scrub..  It's like stepping into a personal spa..  First you pop the lid and the aroma immediately relaxes your senses, the sugar exfoliates and the butters make your skin so creamy and soft you won’t even need lotion. 

A moisturizing treat to nourish your skin!  With added cane sugar for exfoliation.  Looks like frosting in a jar!

Over 20 scents to choose from and some of our favorites and bestselling are: Beach Bum, Just Beachy, Lavender, Vanilla, and Almond Coffee..


Saturday, September 29, 2012

Day 29


DIY Saturday

Giant Fantasy Paper Flowers

Another great DIY on the blog this week- These add a little extra something to any event. So whimsical! 
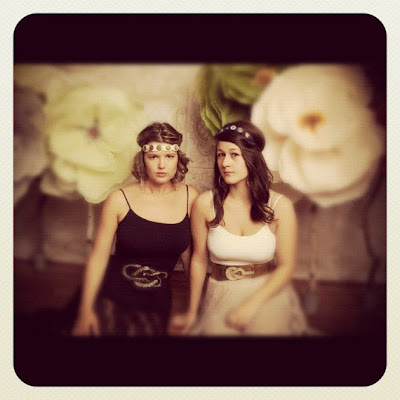
We have these flowers through out the store, we even had them as props for our photo shoot with Mandy at Studio B on Monday. Last week we posted our Enchanted Forest line of headbands, we really wanted to create something along side of them and these fit perfect. Our whimsical daydreams of Enchanted Forests came to life with these Giant Flowers. 

Materials Needed :

For the flower base- 
~ Plastic Cups ( depending on the amount of flowers you need) 
~ Cement 
~ Branches - 2-3 Feet in length

For the Flowers -  
~ Wire
~ Tape & Glue
~ Scissors
~ Tissue Paper
~ Dried Moss
~ Twine or zip ties


Instructions :

To make the base or stem of the flower, first you must determine how many flowers you plan on making. Once you decide, mix the cement and pour in the coordinating number of plastic cups. Before you let it sit, stick a branch in the middle of the cup. Let harden. 


This next step is optional. We made a leaf for one flower, but you can add them to as many of the flowers as you want. Take your wire, ours was thin wire. Cut them into desired lengths and leave a little extra at the end to attach it to your branch or stem of the flower. For ours, I attached directly to the flower. Twist the pieces of wire together to form a leaf. Cut your tissue in to leaf shapes, make two pieces, top and bottom to go around the wire frame. 


Next, add glue around the outside of the leaf and place the wire leaf frame inside, then place the other tissue leaf directly on top. 


Scrunch the outside of the leaf, around the wire frame, as well as inside the leaf. This gives it a little more natural affect. 


On to making the flower. First cut the layers of tissue paper in to petals of various sizes. I chose 3 different sizes for these flowers, and a round edge. But be creative! And about 2-3 tissue PER petal. Since I chose 3 sizes, I cut 4 petals for the small, 4 petals for the medium and 3 petals for the large. 
This way it gives it a fuller look and your flowers look big!


Starting with the smallest petals, form them into a bouquet. I took 2 of the tissue sheets for the small petals and went from there, I had 8 total tissue sheets (2 per small petal). I gathered them with my hand and scrunched them up from the bottom until I got the look I was happy with. 


After scrunching them and creating the look I wanted, I taped this level of petals together, that way I didn't have to worry about them falling apart when adding the next petals. 


Add the next layer of petals together and tape at the stem. Repeat with the remaining layer. So all 3 layers are completed and taped!


Now that the petals are attached and taped to each other, we can start the middle. For the center of the flowers, cut out circles of tissue. Two different sizes are needed, and the edges can be roughly cut. 

Glue stick, tacky glue (or something similar) and dried moss. 


Scrunch together the edges of the circles. 


Dap a small amount of glue in the middle of the bigger circle, and attach the smaller circle. You can scrunch up some more of the sides once you attach them together. Just play with it and get the look you want!


Next, take a small amount of the tacky glue to the center of the circles. Add your dried moss and let dry. 


After you attach the dried moss, attach the center of the flower to the center of the petals with a little more tacky glue. Once you have that completed, start to scrunch the edges of the flower petals and curve them towards the center. This way you get a more natural look. Keep messing with the petals until you whimsical look is achieved! You can attach the flower stem to the branches with a zip tie or like we did with twine. You will noticed the stem of the flower (where you taped) will be pretty long. Use that part to wrap the twine or zip tie around. 


Friday, September 28, 2012

Day 28


Fabulous Fun Fan Friday


A great group of ladies had a book club party last night at the store. What a great way to get together and make some fun headbands! We had so much fun with this group, some familiar faces we see weekly! Thanks for coming in ladies!

Nolan is sporting the adorable Dinosaur Backpack. Such a great piece for preschool or daycare! His sister Madisyn looking fabulous in her felt headband. Our felt headbands add just a little more style to any outfit!


Sherri is wearing one of our scarf head wraps. We can't get enough of you Sherri, always looking so great! 


When is Shannon not rocking out Italy Ava?! Of course she has our shabby chic flower headband, a horse bracelet, watch and our Peter Pan collar shirt!


This handsome little guy is just as fashionable as his mom! Sawyer is wearing an adorable Rugged Butts vest. I don't think he could get any cuter :)


Here is Sawyers' mom, Chelsea. (on the left) She is wearing a polka dot dress we had a few months back. Great detail with the buttons on the pockets! This dress looks fabulous on you Chelsea :) Thanks for the share! 


Kelly is wearing our mustard print tunic. This piece is so gorgeous and looks amazing on you! We love all the detail on this piece.


Thursday, September 27, 2012

Day 27


A Bit of History on Italy Ava
continues......

Fun Facts

My husband Adam does all the renovations, and any maintenance for Italy Ava..  For his 30th Birthday he was given a bedazzled took kit set from the Italy Ava girls..


How do we fit it all in, meaning: family, handmade, blogging,classes, retail ordering, facebook, webpage, photo shoots, working at the store, consignment mgmt..ok I could keep going but honestly we don't get a lot of sleep and go from early morning to late night..  Leiah actually just left my house at 9pm tonight since we had to get some felt and couture headbands made for some up coming events.. and now I'm blogging but also watching storage wars :)  Tomorrow I'll get to spend the day home with the boys..but then head in to teach a late night class.. It's all about balance and priorities and a bit of juggling. 


March 2011 I sign a lease on the old Lillibets location, 305 W Main Street.. we go through months of renovation while also keeping open the 3rd Street  location..  In the end it turns out beautiful, stunning, and more than I could have imagined..I'm awed every day I work..  Every inch of the store is a reflection of my style and unique finds that I love..  I continued handmade, vintage, upcyled furniture but also added women's fashion & a children's line of clothes and accessories..

The main street location has been such a success, I have great space, triple the traffic, and even though I don't look out to a quiet quaint street I have a beautiful historical space that is cozy, warm, and has allowed me to create my dream space..

I believe people are put in your life for different reasons and two of those individuals are Ali Winkleman & Leiah Blomme both gave me vision, inspiration support, and insight of what Italy Ava could be..and is now. I'm blessed that they are both my dear friends and I get to work with them at Italy Ava..


Meet the Staff


Thanks for taking the last few days and going on this journey with me..  It's been heart-warming, emotional, and  joy of writing how Italy Ava happened just off a little dream made into reality..

Wednesday, September 26, 2012

Day 26

A Bit of History on Italy Ava
continued......

Fun Facts

I originally was suppose to open Italy Ava with my mom and right before signing the lease she decided she couldn't make it work with her full-time job..  Her and my dad still renovate and upcyle pieces on consignment at Italy Ava and will host our Autumn Trunk Show..  I also think my mom stated she wasn't sure if she could take me bossing her around on a daily basis.

My first knowledge of artistically being different  is back in kindergarten, we had to decorate these ginger bread men and for a lack of better words mine stuck out like a sore thumb..  He was bedazzled (which I totally would of had the bedazzler if they made it as a child)  to the max..  I remember Mrs. Johnson telling me my gingerbread guy didn't need anymore decorating and feeling devastated because he needed that last pop of yarn...

March 2011 I make a huge business decision..I decide to open store-front..  Since I had started designing back in 2010 it was my short term goal but never expected it to happen so soon..  My husband knowing my thoughts, goals, ambitions and what I wanted out of  Italy Ava, scouts out a small window-front space to rent on 3rd.  I'll never forget that phone conversation..  Laura it's small but it has potential, I really think this space could work for you..  I remember saying saying, "what if everybody hates my stuff and nobody visit's my store".  After much reassurance and support from my family and friends, I sign the lease.  We take 2 months to renovate the space, and  I immediately market my website and facebook for potential consignment artist.  I open May 2011 with: Nessa's Naturals, Vintage Inspired, Pod, Mariannes Bib's, and Nima Nae.. All 5 of these designers/artist are  still with us and we've now grown to over 40..  

In my wildest dreams, I never ever expected my business to take off the way it did and have so many people from the community support me.  Everything seemed perfect other than the fact I was growing out of my space and very quickly..  I kept thinking of options on how I could make it work and we poured so much time and money into this space..I loved looking out at the old library and post office..there was just this quaintness to 3rd Street that I adored...
 So the search begins..........

Here is a few pictures from memory lane:


Tuesday, September 25, 2012

Day 25


A Bit of History on Italy Ava
Continued......

Fun Fact:
Italy Ava opened doors with 5 designers on consignment and now has over 40 on the main street location

Fun Fact
Italy Ava and Studio B (http://www.fineartstudiob.com) formed a partnership back in 2011...  Mandy has taken hundreds of images of our handmade finds, fashion, accessories, families, Leiah and I, and  consignment artist. Our biggest achievement in our partnership was the photo shoot in Paris and Czech Republic with the Italy Ava vintage line.  http://www.italyava.blogspot.com/2012/09/day-1.html


 In the summer of 2010 I started a online business with Italy Ava at etsy.com.  My first designs were vintage button rings and barrettes.


Autumn 2010 I catch my big break with BlueGreen Flowers..  My father-in-law had causally been talking to Kim and Christine (owners) and mentioned some of my designs. At this point my line had extensively expanded into many more designs. I was contacted by the girls to be featured in their Green Door Gallery..  Green Door Gallery was a part of the store where they would feature designers/artist each month and I was totally honored to be the first.  After my feature I was asked to continue in BlueGreen selling my handmade finds..  Kim and Christine are two of the kindest woman I have ever met and played such a instrumental part of the development of Italy Ava.  Featuring my designs in BlueGreen gave me the opportunity to see if there was market for unique handmade finds and for that I'm eternally grateful..  Thank you to my very first customers and still loyal customers:  Alison Winkleman, Jen Thomas, Heather Schrunk, Shannon Carrow and many more, who found me over at BlueGreen to 3rd Street, and now to Main..  
For more information on Blue Green: